Designing Luxury Modern Bedrooms: How to Prototype Premium Textures with AI
Luxury bedroom clients arrive with fabric swatches, strong opinions, and a low tolerance for surprises. They won't commission a custom fabricator until they can see exactly what they're buying. This guide covers how to use per-element material control and high-resolution AI rendering to close that gap — prototyping fluted walnut paneling, bespoke velvet headboards, and venetian plaster walls before a single fabricator quote lands on your desk.
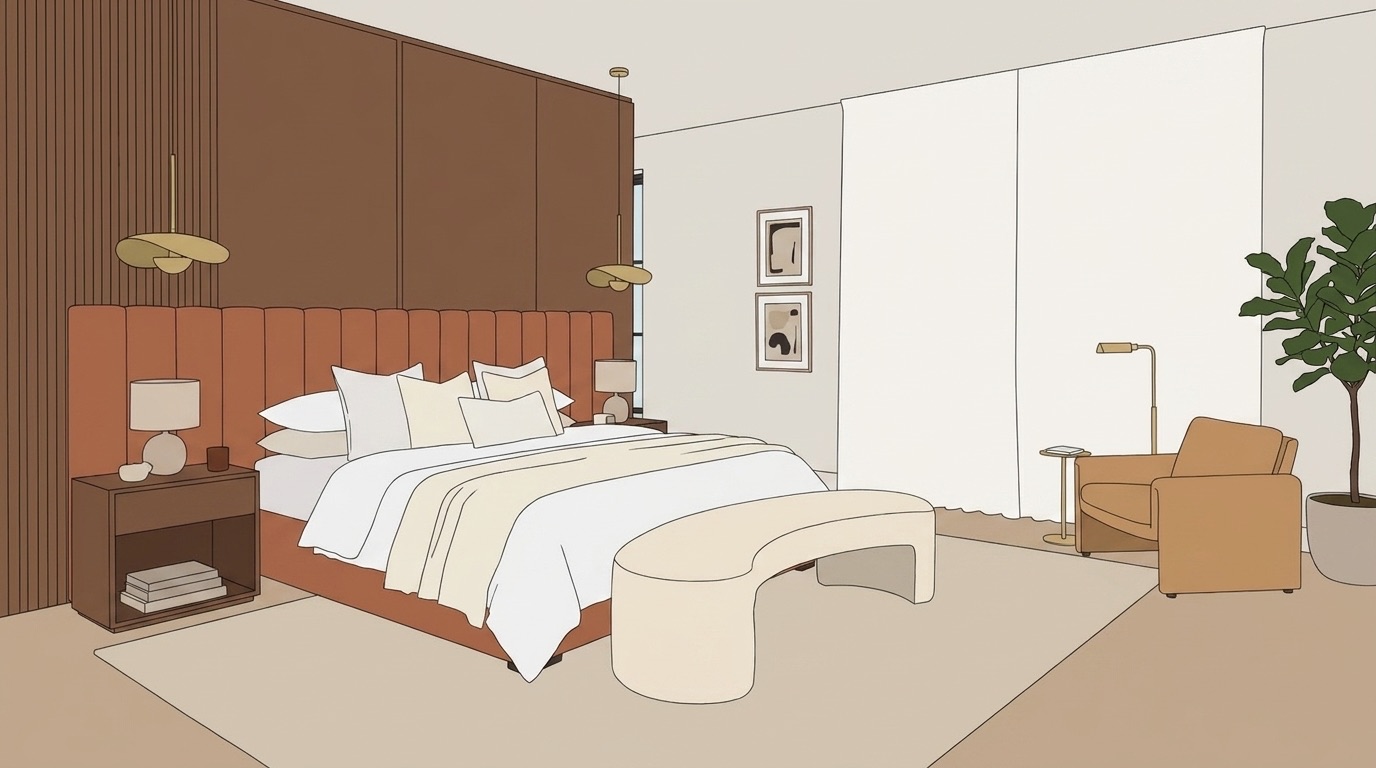 AFTER — PHOTOREALISTIC RENDER
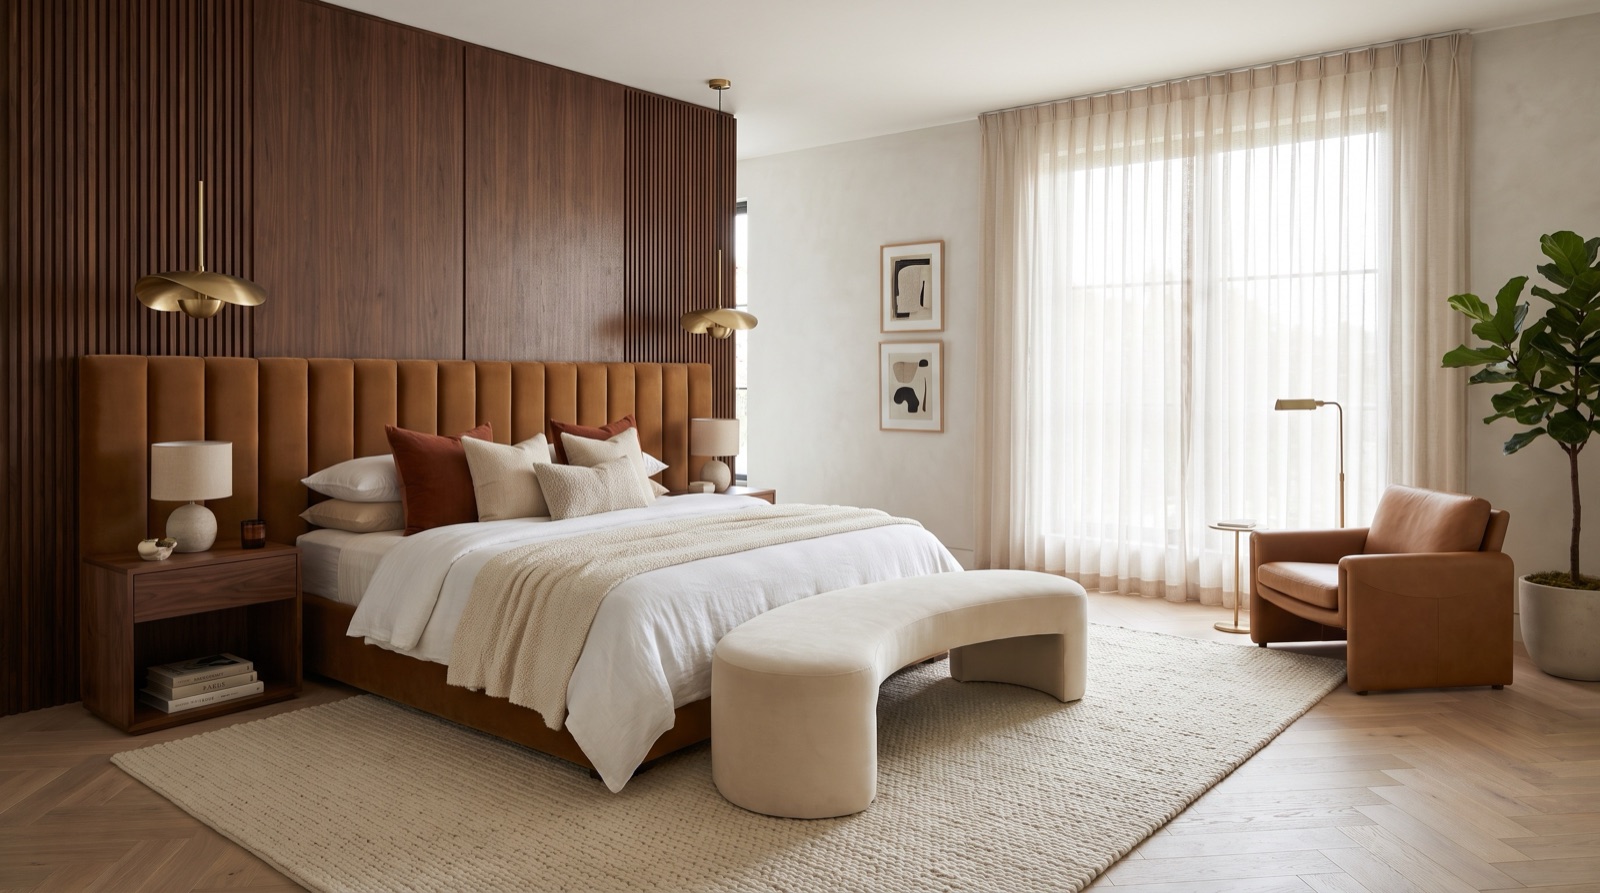
Fluted walnut, caramel velvet, venetian plaster — from concept drawing to photorealistic visual before a single fabricator quote.
Why bedrooms demand more precision than any other room
In a living room, a sofa cluster carries enough visual mass to absorb a finish that isn't quite right. In a bedroom, the headboard, the panel wall behind it, and the ceiling treatment are the entire visual conversation. There is no furniture arrangement to soften a colour mismatch or a texture that reads heavier than the mood board suggested. Everything is exposed, at close range, in raking light.
This is compounded by the unit economics of luxury bedroom interior design. A run of bespoke fluted walnut joinery can cost €3,000 to €6,000 per metre. A custom upholstered headboard in a client's own fabric is non-returnable. A venetian plaster finish applied to four walls takes two weeks and leaves little room for a change of heart. The cost of a misaligned expectation is not a revision — it is a redo.
Photorealistic AI rendering changes the economics of that risk. Instead of asking a client to approve a mood board and a paint chip, you show them a full-room render with the exact materials you intend to specify — before any fabricator has been briefed, any deposit paid, or any plaster mixed.
Per-element material control for high-specification bedrooms
The workflow starts with a single image: a sketch, a 3D export, or a photo of the existing room. Upload it to Vizbase and the AI auto-detects every element — walls, ceiling, bed frame, headboard, paneling, floor, curtains — drawing clickable masks over each one in 5–10 seconds.
Click the panel wall mask and type “fluted walnut paneling, matte oil finish, 80mm flute pitch, warm mid-tone.” Click the headboard and type “caramel boucle velvet, tight channel tufting, brass nail-head trim.” Click the walls and type “venetian plaster, warm ivory, hand-applied texture with visible trowel marks.” Click the floor and type “herringbone white oak, matte lacquer, narrow strip.” A photorealistic render of the whole room comes back in 30–60 seconds.
The specificity the system accepts is what makes this practical for luxury work. You are not choosing between “wood” and “upholstery” — you are using the same language you would send to a fabricator. The render reflects that language back as a photorealistic image, which is a document you can share with the client the same afternoon the specification is drafted.
If you have a physical swatch — a sample of the actual velvet, a tile of the stone, a chip of the lacquer — you can attach it as a reference image per element. The render attempts to match it. A client holding a fabric sample in one hand and a photorealistic bedroom image in the other is in a fundamentally different conversation than one reviewing a mood board.
Experimenting with maximalist and organic modern safely
The two styles driving the highest-value bedroom commissions right now — maximalist layering and organic modern — are both expensive to prototype through traditional channels. Maximalist asks you to combine five or six premium materials in the same frame and trust that they cohere. Organic modern asks you to source natural finishes — limewash, raw plaster, river stone, mango wood — that look very different on a supplier's website than they do at room scale in evening light.
Smart inpainting lets you regenerate one element while everything else stays fixed. Swap the headboard fabric without touching the floor or the wall finish. Try the wall in limewash, then venetian plaster, then textured grasscloth — three options in under three minutes, each a full photorealistic render. Show all three to the client at the same meeting and let them eliminate rather than guess. The approach mirrors the consultation style luxury clients prefer: informed decisions from a curated shortlist, not open-ended imagination exercises.
For studios experimenting with the “quiet luxury” or “organic modern” aesthetic — warm neutrals, natural textures, considered layering — this iteration loop is particularly valuable. The materials that read as serene and grounded in an editorial photograph can feel cold or busy at 1:1 scale. Rendering them in the actual room geometry, at the actual proportions, catches those misreadings before they become expensive ones.
From AI prototype to fabricator brief
The render is not the end of the process — it is the document that makes the fabricator conversation precise. When a client has approved a photorealistic image showing “fluted walnut, 80mm pitch, matte oil finish, warm mid-tone,” the fabricator brief writes itself. The ambiguity that normally costs two or three rounds of physical sampling is resolved before the first sample is cut.
Pair the approved render with the written material specification you used to generate it — the exact text descriptions you typed per element. That combination is a more actionable brief than a mood board alone, and a more precise reference if the fabricated result diverges from what was approved.
The upscale feature takes any render to 6x its original resolution — sufficient for A3 printing at 150 DPI. At that size, on a physical board in a client's home or at a site visit, material relationships read at something closer to real scale. A caramel velvet next to fluted walnut looks different at A3 than it does on a laptop screen in a studio meeting. The print-size output is where final approval decisions carry the most confidence.
For studios working on multiple luxury bedrooms simultaneously, see how local interior designers are using AI to maintain the high-touch client experience while compressing the iteration timeline. The full methodology for applying AI across every room type is covered in the AI interior design complete guide.
Frequently asked questions
How do you visualize custom furniture and joinery before fabrication?
Upload a sketch, 3D model export, or photograph of the space to Vizbase. The AI auto-detects every element in 5–10 seconds and draws clickable masks over each one — including the planned furniture if it is visible in the source image. Click a mask and describe the piece in detail: dimensions, material, finish, hardware. The render comes back in 30–60 seconds as a photorealistic image showing the furniture in context, at scale, alongside the rest of the room. You can iterate element by element using smart inpainting — change one piece without disturbing the rest of the render.
Can AI match a specific material swatch or fabric sample?
Yes. For each element, you can attach a reference image alongside the text description — a photo of the velvet swatch, a tile from the stone supplier, a chip of the paint colour. The render uses that image as a reference when generating the element, producing a closer match than text description alone. This is particularly useful for bespoke or custom materials that are difficult to describe in generic terms, such as a hand-dyed linen with a specific warp direction or a stone with an unusual veining pattern.
What resolution do I need for a luxury client presentation board?
For digital presentation — screen, PDF, projected — the standard render resolution is sufficient. For printed presentation boards at A3 or A2, use the upscale feature to take the render to 6x its original resolution. At 6x, a standard Vizbase output prints at roughly A3 at 150 DPI, which is adequate for client-facing boards viewed at arm's length. If you are producing A2 or larger for a site visit or contractor briefing, upscale to maximum, then apply a light sharpening pass in your preferred image editor before printing.
How do I prototype maximalist layering without committing to expensive materials?
Run the workflow per-element: describe each material individually, generate a full-room render, and use smart inpainting to swap individual elements without regenerating the whole scene. For maximalist schemes — where five or six premium materials need to cohere — this lets you compare combinations quickly. Try a caramel velvet headboard against ivory venetian plaster, then swap the plaster for a deep charcoal limewash in the next iteration. Each swap takes under a minute. You can present clients with three or four coherent schemes in a single meeting, derived from the same base render, without any physical sampling costs.
Which bedroom elements benefit most from per-element AI material control?
The headboard wall assembly — the headboard itself, the panel or plaster treatment flanking it, and the ceiling finish above — carries most of the visual weight in a modern luxury bedroom and responds most clearly to precise material specification. The floor material is the second most impactful element, particularly in rooms where a bed platform or area rug anchors the scheme. Window treatments — full-length drapes in a textured fabric — are frequently underspecced in mood boards but read significantly in a rendered room. Lighting fixture finishes — brass versus brushed nickel versus matte black — are fast to iterate and often resolve the final material palette when a scheme is close but not settled.
Ready to prototype your next luxury bedroom?
5 free renders. No credit card. Start with a photo or 3D export of the room.
GET STARTED FREE